- Published on
9 Simple (But Important) React JS Coding Exercises You Need To Do As A Beginner
- Authors

- Name
- Karla Dampilag
- @KarlaDampilag
You know what they say, if you REALLY want to learn React, build something! Don't get stuck in tutorial hell.
Well, what if you're not that far into your journey, and still aren't able to build full-blown projects?
That's what this post is for, which is inspired by the post, "12 Exercises to Learn React Native".
React JS Exercises
These exercises will help you apply the basic concepts of React through tiny projects. Once you finish all exercises, you'll know you've got the basics down. Then you can start learning more advanced concepts, and build more complicated projects.
So let's get started!
React JS Coding Challenges
Exercise 1: Hello World!
Every programming language starter tutorial teaches you how to output "Hello, World!" using the language.
But this exercise is not just for tradition.
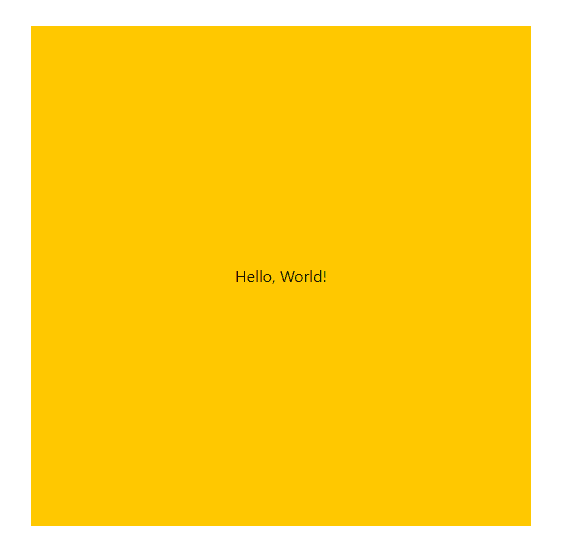
This will asses if you actually know HTML, which is one of the many prerequisites before learning React. Start by rendering a square with a background color. Inside the square, render "Hello, World!".

Helpful links:
Exercise 2: Capturing User Clicks
What makes a web app different from a static website? A web app is interactive. Of course, there's more to web apps than capturing clicks, but it's important to start from the basics.
This exercise gets you started with event handling, which is a basic concept not only in React but also in JavaScript (which is again another pre-requisite before learning React).
Using the native HTML <button> tag, capture the click event and alert the message, "Clicked!".
Take note that capturing events such as clicks is done differently in React than it is in JavaScript.

Helpful links:
Exercise 3: Custom Component
In the previous exercise, we used the HTML <button> tag. But much of the power that React provides to us developers is being able to create our own components and reuse them.
You'll be creating more complicated custom components than a simple button in the near future, but we all gotta start somewhere.
In this exercise, build your own Button component and render it three times. On user click, it should alert which button was clicked:

The custom component should accept an onClick prop. On render, it should render the children betwen the button. This is the text you want for the button.
Think of it like the HTML <button> tag. Whatever text you place between the opening and closing tag is rendered between the button when you inspect the element in your browser developer console.
On user click, it should alert which button was clicked.
Helpful links:
Exercise 4: State and Props
So you're comfortable working with props, congratulations! Using props allows us to pass values or functions down to a child component.
State is another integral concept we must learn in React. It allows us to store values, and React automatically updates our UI when the values change.
That's one of the many beautiful things with React. We don't need to manually handle these things - React does the UI re-rendering for us when a value changes. But we must know how to use the state for this purpose.
This exercise is simple, and is a very common React tutorial out there. Use the useState React hook to track how many times a button is clicked, and display the number.
The number must increment each time the button is clicked:

Helpful link:
Exercise 5: Mapping Through A List And Rendering
To get comfortable with React, you must learn declarative programming.
React is declarative. So you need to think in "declarative programming" whenever you work with React, and this exercise is perfect for that. This is the "opposite" of imperative programming which is the paradigm used in Vanilla JavaScript.
In this exercise, instead of manually and "imperatively" coding the render of each item in a list, use the map function to "declare" how React should render the list.
Given an array:
['dog', 'cat', 'chicken', 'cow', 'sheep', 'horse']
Use the map function to render them in an unordered list:
- dog
- cat
- chicken
- cow
- horse
Once you learn the concept of rendering declaratively, you'll see how much life becomes easier (overstatement).
But think of it this way...
Our example list is not that big, but imagine if the list contains thousands of items, which is true when working with real-life data and real-world applications. You wouldn't want to manually code each <li> one thousand times, right?
And what if the data changes? This is the case when working with data in production environment. You'll have to change the code again.
But not when you rendered the list declaratively. When the data changes, and you rendered your data presentation declaratively, a.k.a. the smart way, then your declarative code does the change for you.
Helpful links:
Exercise 6: Mapping Through A List And Rendering (With A Custom Component)
In exercise 3, we mentioned that part of what makes React so great is that it allows us to create our custom, re-usable components.
You only created a custom button there. This time, you'll create a custom component that displays each item from exercise 5:
['dog', 'cat', 'chicken', 'cow', 'sheep', 'horse']
Instead of using the <ul> and <li> HTML tags, create a custom component that accepts a list as its prop, and renders it accordingly.
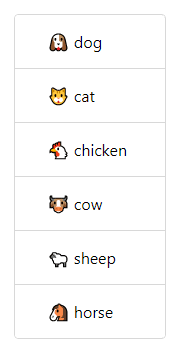
It's up to you how you want this list will look like. I decided mine to look like this:

What's the point of creating custom components? You'll be able to re-use them. Think of it like creating your own functions.
Instead of copy-pasting the same lines of code everywhere you need them, you put those blocks of code inside a separate function, and you just call that function whenever you need it.
This is very good practice because if you need to make changes to your code, you don't need to change it in every place where you used it. You just need to change it in one place.
That's one of the many benefits of using custom components. There are more reasons to using custom components, which needs a whole new blog post, but this is a good start.
Helpful links:
Exercise 7: Building A Form
Unleash some more power from React by building a form. React is great for this.

Build a form that accepts a first name and a last name. And instead of a boring "Submit" button, make a button that says "Greet Me" that when clicked, will alert "Hello [first name] [last name]!".
Here you will use a combination of concepts from previous exercises, such as using state, and event listening both on text input and button click.
But there is one specific concept we didn't tackle yet:
Exercise 8: Rendering JSON
Most of the time, the structure of the data we're working with in real-world applications aren't simple lists like ['dog', 'cat', 'chicken', 'cow', 'sheep', 'horse'].
A lot of data is stored in JSON format. This is especially true when you're fetching data from a database.
JSON stands for JavaScript Object Notation, a type of format for data interchange.
This type of data is just an object instead of a simpler datatype such as a string.
For example, an array of JSON objects looks like this:
[
	{
		id: 1,
		setup: "What's the best thing about a Boolean?",
		punchline: "Even if you're wrong, you're only off by a bit"
	},
	{
		id: 2,
		setup: "Why do programmers wear glasses?",
		punchline: "Because they need to C#"
	}
]
To keep it simple, let's keep it to only two items.
Using the array of objects above, render the jokes with React.
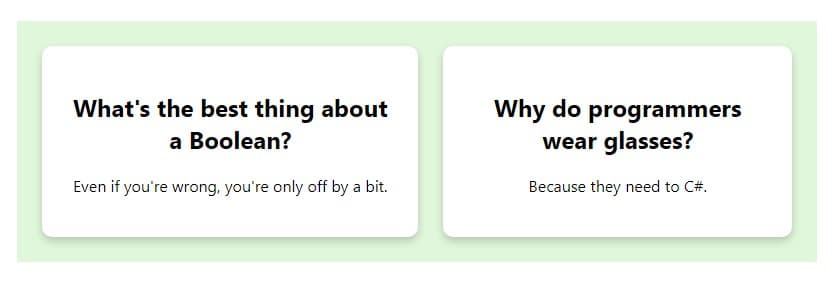
Here's how I decided to render mine:

Tip:
- Create a custom component for rendering each joke.
- Using the map function, map through each object in the array. Use the custom component to render each object.
Helpful links:
Exercise 9: Working with an API
Last but definitely not the least, work with an API and build a simple frontend:

Every React or any frontend developer must learn how to work with an API. When building applications, you receive data from the backend or an outside source which you will have to present nicely in the UI.
Fetch from this API endpoint: https://random-data-api.com/api/users/random_user?size=10
This will return ten random users.
Here we'll put together everything we did from the previous examples:
- Show each user's basic info in a card.
- When a card is hovered upon, the card flips to show more information about the user.
- There should also be a button that when clicked, will fetch another set of 10 random users, which updates the cards.
Here are the steps for this exercise:
- Fetch the data from the URL. You also have to handle converting the JSON response into a JavaScript object in this process. (See Response.json() resource link below)
- Store it in React state.
- Render the data based on the state.
Take note that most APIs return data in the form of JSON. Good thing we already covered JSON in the previous exercise 😄
Hints:
- Do the fetching inside a useEffect React hook
- Create a custom component for the card, which accepts a user JSON object. Map through the data returned from the API and render each one using the custom component.
Helpful links:
We'll also be needing a lot more CSS, especially for the card hover effect:
Conclusion - React Practice Problems
If you're an aspiring React developer, these exercises will help you understand many concepts that are integral in both React and frontend web development as a whole.
Every exercise here is used in my daily life as a React developer. And I hope this helps you get closer to your goal. Soon they'll be second nature to you, and you'll be coding them without even thinking about it!
If you find yourself stuck, or need any help with the exercises, just let me know and I'd be happy to help.
I'm over at Twitter as well, and I have a newsletter where I send updates for new posts like this.
Hope you have fun learning!